Svelte wąż wdrożony na deno
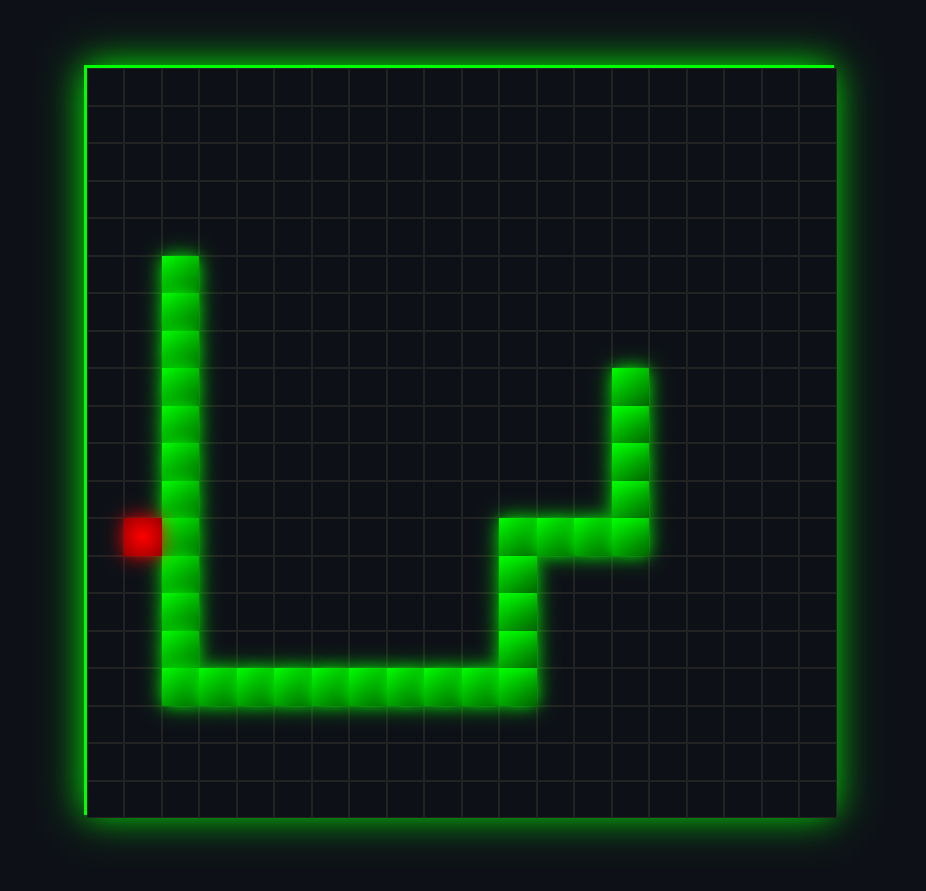
Svelte Snake to prosta gra napisana w Svelte. Jest wdrożona na Deno, bezpiecznym środowisku uruchomieniowym dla JavaScript i TypeScript.

Daniel Gustaw
• 9 min read

O projekcie
Ten samouczek pokazuje, jak napisać grę Snake w Svelte. Wymaga podstawowej wiedzy o obiektach i metodach tablic. W pierwszej części będziemy mogli wyświetlić mapę, węża i umożliwić wężowi ruch w wybranym kierunku. Ten kod nie będzie grywalną wersją gry, ale postanowiłem podzielić ten projekt na fragmenty ze względu na najwyższą wartość edukacyjną prezentowania procesu budowania kodu, a nie tylko ostatecznego wyniku.
Utwórz aplikację svelte
Zacznijmy od stworzenia aplikacji svelte.
npx sv create svelte-snake
cd svelte-snake
Możemy to zacząć od
pnpm i && pnpm dev
Teraz możemy zacząć pisać grę.
w src/routes/+page.svelte ustaw kod
<script>
    let snake = [{ x: 5, y: 5 }];
    let direction = { x: 1, y: 0 };

    const move = () => {
        snake = [{ x: snake[0].x + direction.x, y: snake[0].y + direction.y }, ...snake.slice(0, -1)];
    };

    setInterval(move, 200);
</script>

<div>
    {#each snake as segment}
        <div class="snake-segment" style="top: {segment.y * 20}px; left: {segment.x * 20}px;"></div>
    {/each}
</div>

<style>
    .snake-segment {
        position: absolute;
        width: 20px;
        height: 20px;
        background: green;
    }
</style>
widzimy, że wąż porusza się w prawo.
Renderowanie mapy
Teraz możemy wyrenderować mapę. Stworzymy mapę 20x20.
<script>
    let snake = [{ x: 5, y: 5 }];
    let direction = { x: 1, y: 0 };

    const move = () => {
        snake = [{ x: snake[0].x + direction.x, y: snake[0].y + direction.y }, ...snake.slice(0, -1)];
    };

    setInterval(move, 200);

    let map = Array.from({ length: 20 }, () => Array.from({ length: 20 }, () => 0));
</script>

<div>
    {#each snake as segment}
        <div class="snake-segment" style="top: {segment.y * 20}px; left: {segment.x * 20}px;"></div>
    {/each}

    {#each map as row, y}
        {#each row as cell, x}
            <div class="map-cell" style="top: {y * 20}px; left: {x * 20}px;"></div>
        {/each}
    {/each}
</div>

<style>
    .snake-segment {
        position: absolute;
        width: 20px;
        height: 20px;
        background: green;
    }

    .map-cell {
        position: absolute;
        width: 20px;
        height: 20px;
        background: white;
        border: 1px solid black;
    }
</style>
Ruch węża
Teraz możemy poruszać wężem w wybranym kierunku. Używamy onMount, aby uniknąć pytania o obiekt window po stronie serwera.
<script>
    import { onMount } from 'svelte';

    let snake = [{ x: 5, y: 5 }];
    let direction = { x: 1, y: 0 };

    const move = () => {
        snake = [{ x: snake[0].x + direction.x, y: snake[0].y + direction.y }, ...snake.slice(0, -1)];
    };

    setInterval(move, 200);

    let map = Array.from({ length: 20 }, () => Array.from({ length: 20 }, () => 0));

    onMount(() => {
        window.addEventListener('keydown', (event) => {
            if (event.key === 'ArrowUp') {
                direction = {x: 0, y: -1};
            } else if (event.key === 'ArrowDown') {
                direction = {x: 0, y: 1};
            } else if (event.key === 'ArrowLeft') {
                direction = {x: -1, y: 0};
            } else if (event.key === 'ArrowRight') {
                direction = {x: 1, y: 0};
            }
        });
    });
</script>

<div>
    {#each map as row, y}
        {#each row as cell, x}
            <div class="map-cell" style="top: {y * 20}px; left: {x * 20}px;"></div>
        {/each}
    {/each}

    {#each snake as segment}
        <div class="snake-segment" style="top: {segment.y * 20}px; left: {segment.x * 20}px;"></div>
    {/each}
</div>

<style>
    .snake-segment {
        position: absolute;
        width: 20px;
        height: 20px;
        background: green;
    }

    .map-cell {
        position: absolute;
        width: 20px;
        height: 20px;
        background: white;
        border: 1px solid black;
    }
</style>
Wąż jedzący
Teraz możemy sprawić, aby wąż jadł jedzenie. Dodamy obiekt jedzenia i sprawdzimy, czy głowa węża znajduje się na pozycji jedzenia.
Następnie wygenerujemy nową pozycję jedzenia i dodamy nowy segment do węża, nie usuwając ostatniego segmentu.
<script>
    import { onMount } from 'svelte';

    let snake = [{ x: 5, y: 5 }];
    let direction = { x: 1, y: 0 };
    let food = { x: 10, y: 10 };

    const move = () => {
        const head = { x: snake[0].x + direction.x, y: snake[0].y + direction.y };

        if (head.x === food.x && head.y === food.y) {
            food = { x: Math.floor(Math.random() * 20), y: Math.floor(Math.random() * 20) };
            snake = [head, ...snake];
        } else {
            snake = [head, ...snake.slice(0, -1)];
        }
    };

    setInterval(move, 200);

    let map = Array.from({ length: 20 }, () => Array.from({ length: 20 }, () => 0));

    onMount(() => {
        window.addEventListener('keydown', (event) => {
            if (event.key === 'ArrowUp') {
                direction = {x: 0, y: -1};
            } else if (event.key === 'ArrowDown') {
                direction = {x: 0, y: 1};
            } else if (event.key === 'ArrowLeft') {
                direction = {x: -1, y: 0};
            } else if (event.key === 'ArrowRight') {
                direction = {x: 1, y: 0};
            }
        });
    });
</script>

<div>
    {#each map as row, y}
        {#each row as cell, x}
            <div class="map-cell" style="top: {y * 20}px; left: {x * 20}px;"></div>
        {/each}
    {/each}

    {#each snake as segment}
        <div class="snake-segment" style="top: {segment.y * 20}px; left: {segment.x * 20}px;"></div>
    {/each}

    <div class="food" style="top: {food.y * 20}px; left: {food.x * 20}px;"></div>
</div>

<style>
    .snake-segment {
        position: absolute;
        width: 20px;
        height: 20px;
        background: green;
    }

    .map-cell {
        position: absolute;
        width: 20px;
        height: 20px;
        background: white;
        border: 1px solid black;
    }

    .food {
        position: absolute;
        width: 20px;
        height: 20px;
        background: red;
    }
</style>
Wykrywanie kolizji
Aby gra była grywalna, musimy dodać wykrywanie kolizji. Sprawdzimy, czy głowa węża znajduje się na granicy mapy lub na ciele węża.
<script lang="ts">
    import { onMount } from 'svelte';

    let snake = [{ x: 5, y: 5 }];
    let direction = { x: 1, y: 0 };
    let food = { x: 10, y: 10 };
    const gridSize = 20;
    let gameOver = false;

    const move = () => {
        if (gameOver) return;

        const head = { x: snake[0].x + direction.x, y: snake[0].y + direction.y };

        // Check for collisions with borders
        if (head.x < 0 || head.x >= gridSize || head.y < 0 || head.y >= gridSize) {
            endGame("You hit the border!");
            return;
        }

        // Check for collisions with the snake itself
        if (snake.some(segment => segment.x === head.x && segment.y === head.y)) {
            endGame("You collided with yourself!");
            return;
        }

        // Check if the snake eats the food
        if (head.x === food.x && head.y === food.y) {
            food = { x: Math.floor(Math.random() * gridSize), y: Math.floor(Math.random() * gridSize) };
            snake = [head, ...snake];
        } else {
            snake = [head, ...snake.slice(0, -1)];
        }
    };

    const endGame = (message: string) => {
        gameOver = true;
        console.log(message); // Optionally log the message for debugging
    };

    const resetGame = () => {
        gameOver = false;
        snake = [{ x: 5, y: 5 }];
        direction = { x: 1, y: 0 };
        food = { x: Math.floor(Math.random() * gridSize), y: Math.floor(Math.random() * gridSize) };
    };

    setInterval(move, 200);

    let map = Array.from({ length: gridSize }, () => Array.from({ length: gridSize }, () => 0));

    onMount(() => {
        window.addEventListener('keydown', (event) => {
            if (gameOver) return;
            if (event.key === 'ArrowUp' && direction.y === 0) {
                direction = { x: 0, y: -1 };
            } else if (event.key === 'ArrowDown' && direction.y === 0) {
                direction = { x: 0, y: 1 };
            } else if (event.key === 'ArrowLeft' && direction.x === 0) {
                direction = { x: -1, y: 0 };
            } else if (event.key === 'ArrowRight' && direction.x === 0) {
                direction = { x: 1, y: 0 };
            }
        });
    });
</script>

<div>
    {#if gameOver}
        <div class="overlay">
            <p>Game Over!</p>
            <button on:click={resetGame}>Restart</button>
        </div>
    {/if}

    {#each map as row, y}
        {#each row as cell, x}
            <div class="map-cell" style="top: {y * 20}px; left: {x * 20}px;"></div>
        {/each}
    {/each}

    {#each snake as segment}
        <div class="snake-segment" style="top: {segment.y * 20}px; left: {segment.x * 20}px;"></div>
    {/each}

    <div class="food" style="top: {food.y * 20}px; left: {food.x * 20}px;"></div>
</div>

<style>
    .snake-segment {
        position: absolute;
        width: 20px;
        height: 20px;
        background: green;
    }

    .map-cell {
        position: absolute;
        width: 20px;
        height: 20px;
        background: white;
        border: 1px solid black;
    }

    .food {
        position: absolute;
        width: 20px;
        height: 20px;
        background: red;
    }

    .overlay {
        position: absolute;
        top: 0;
        left: 0;
        width: 100%;
        height: 100%;
        background: rgba(0, 0, 0, 0.8);
        color: white;
        display: flex;
        flex-direction: column;
        justify-content: center;
        align-items: center;
        z-index: 10;
    }

    .overlay button {
        margin-top: 10px;
        padding: 10px 20px;
        background: white;
        color: black;
        border: none;
        cursor: pointer;
        font-size: 1rem;
    }
</style>
To koniec klasycznej gry w węża. Zamierzamy dodać więcej funkcji, takich jak wynik, zwiększenie prędkości, tryb wieloosobowy, ale najpierw wdrożymy tę grę na Deno Deploy.
Wdrożenie na Deno
Są dostępne dokumenty dotyczące adapterów svelte kit oraz dyskusja na reddicie.
Zarówno dokumenty, jak i dyskusja nie przedstawiają żadnego działającego rozwiązania udokumentowanego krok po kroku.
Jest pulpit nawigacyjny Deno https://dash.deno.com/projects, gdzie możesz wybrać svelte, ale nie działa to domyślnie.
Najpierw musimy zamienić @sveltejs/adapter-auto na @sveltejs/adapter-static w svelte.config.js.
pnpm remove @sveltejs/adapter-auto
pnpm add @sveltejs/adapter-static
w svelte.config.js zmień
import adapter from "@sveltejs/adapter-auto";
do
import adapter from "@sveltejs/adapter-static";
aby umożliwić pełne prerenderowanie wszystkich tras, dodajemy plik src/routes/+layout.ts z zawartością
export const prerender = true;
Teraz, jeśli uruchomimy pnpm build, będziemy mieli katalog build z plikami statycznymi.
Aby obsłużyć ten katalog, potrzebujemy jeszcze jednego skryptu - statoc/mod.ts w katalogu głównym.
import { serve } from "https://deno.land/[email protected]/http/mod.ts";

serve((req) => {
    const url = new URL(req.url);
    const filePath = `${Deno.cwd()}${url.pathname}`;

    try {
        const file = Deno.readFileSync(filePath);
        const contentType = getContentType(url.pathname);
        return new Response(file, {
            headers: { "content-type": contentType || "application/octet-stream" },
        });
    } catch {
        const file = Deno.readFileSync(`${Deno.cwd()}/index.html`);
        return new Response(file, {headers: { "content-type": "text/html" } });
    }
});

function getContentType(pathname: string): string | undefined {
    const ext = pathname.split(".").pop();
    switch (ext) {
        case "html": return "text/html";
        case "js": return "application/javascript";
        case "css": return "text/css";
        case "png": return "image/png";
        case "jpg": return "image/jpeg";
        case "svg": return "image/svg+xml";
        case "json": return "application/json";
        default: return undefined;
    }
}
Konfigurowanie deno deploy ręcznie spowoduje wygenerowanie pliku workflow github actions .github/workflows/deploy.yml z zawartością
name: Deploy
on:
  push:
    branches: main
  pull_request:
    branches: main

jobs:
  deploy:
    name: Deploy
    runs-on: ubuntu-latest

    permissions:
      id-token: write # Needed for auth with Deno Deploy
      contents: read # Needed to clone the repository

    steps:
      - name: Clone repository
        uses: actions/checkout@v4

      - name: Install Deno
        uses: denoland/setup-deno@v2
        with:
          deno-version: v2.x

      - name: Install Node.js
        uses: actions/setup-node@v4
        with:
          node-version: lts/*

      - name: Install step
        run: "deno install --allow-scripts"

      - name: Build step
        run: "npm run build"

      - name: Upload to Deno Deploy
        uses: denoland/deployctl@v1
        with:
          project: "snake-svelte"
          entrypoint: "mod.ts"
          root: "build"
więc mod.ts w static będzie umieszczony w katalogu build.
Teraz możesz wdrożyć, po prostu wysyłając kod do repozytorium GitHub.
Możesz zobaczyć wynik na
https://snake-svelte-ppwa4dcfqbyd.deno.dev/
Lub dla bardziej zaawansowanej wersji, która zostanie opisana w następnych postach
https://snake-svelte.deno.dev/
Repozytorium z projektem
https://github.com/gustawdaniel/snake_js
Dodałem kilka zmian w css, aby gra była bardziej grywalna, które nie są wystarczająco interesujące, aby dołączyć je tutaj, ale możesz je sprawdzić w commit
Other articles
You can find interesting also.

Analiza logów Apache z GoAccess
W tym wpisie pokazuję narzędzie pozwalające wydobywać ciekawe informacje z plików generowanych automatycznie podczas pracy serwera.

Daniel Gustaw
• 20 min read

Logowanie danych w MySql, Ajax i Behat
Napiszemy prostą aplikację webową - kalkulator. Na jego przykładzie pokażemy jak skonfigurować selenium z behatem i wykonać na nim testy automatyczne.

Daniel Gustaw
• 15 min read

Infrastruktura jako kod (terraform + digital ocean)
We wpisie pokazuję w jaki sposób rozstawić serwery z linii poleceń terraform.

Daniel Gustaw
• 3 min read