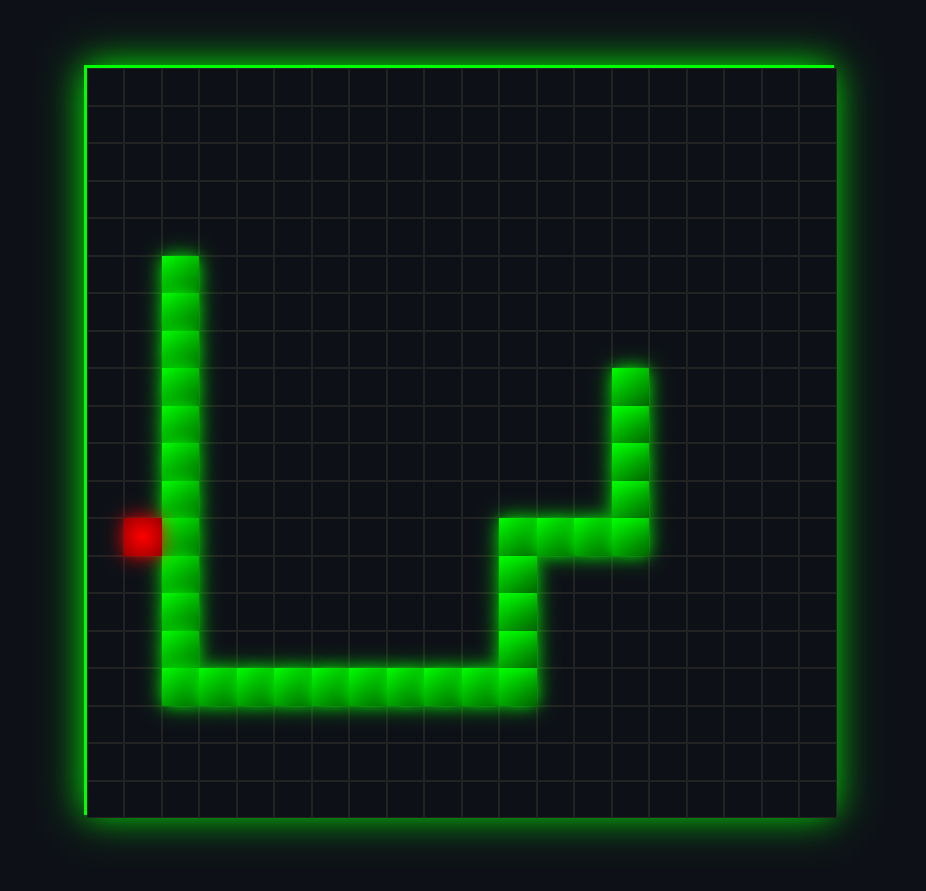
Svelte snake deployed on deno
Svelte Snake is a simple game written in Svelte. It's deployed on Deno, a secure runtime for JavaScript and TypeScript.

Daniel Gustaw
• 9 min read

About project
This tutorial shows how to write Snake Game in Svelte. It requires basic knowledge of objects and methods of arrays. In first part we are going to be able to display map, snake and allow snake to move in chosen direction. This code will be not playable version of game, but I decided to depart this project to fragments because of highest educational value of presenting process of building code, not only final result.
Create svelte app
Let’s start with creating svelte app.
npx sv create svelte-snake
cd svelte-snake
We can start it with
pnpm i && pnpm dev
Now we can start writing game.
in src/routes/+page.svelte set code
<script>
    let snake = [{ x: 5, y: 5 }];
    let direction = { x: 1, y: 0 };

    const move = () => {
        snake = [{ x: snake[0].x + direction.x, y: snake[0].y + direction.y }, ...snake.slice(0, -1)];
    };

    setInterval(move, 200);
</script>

<div>
    {#each snake as segment}
        <div class="snake-segment" style="top: {segment.y * 20}px; left: {segment.x * 20}px;"></div>
    {/each}
</div>

<style>
    .snake-segment {
        position: absolute;
        width: 20px;
        height: 20px;
        background: green;
    }
</style>
we can see that snake is moving to the right.
Map rendering
Now we can render map. We will create 20x20 map.
<script>
    let snake = [{ x: 5, y: 5 }];
    let direction = { x: 1, y: 0 };

    const move = () => {
        snake = [{ x: snake[0].x + direction.x, y: snake[0].y + direction.y }, ...snake.slice(0, -1)];
    };

    setInterval(move, 200);

    let map = Array.from({ length: 20 }, () => Array.from({ length: 20 }, () => 0));
</script>

<div>
    {#each snake as segment}
        <div class="snake-segment" style="top: {segment.y * 20}px; left: {segment.x * 20}px;"></div>
    {/each}

    {#each map as row, y}
        {#each row as cell, x}
            <div class="map-cell" style="top: {y * 20}px; left: {x * 20}px;"></div>
        {/each}
    {/each}
</div>

<style>
    .snake-segment {
        position: absolute;
        width: 20px;
        height: 20px;
        background: green;
    }

    .map-cell {
        position: absolute;
        width: 20px;
        height: 20px;
        background: white;
        border: 1px solid black;
    }
</style>
Snake movement
Now we can move snake in chosen direction. We’re using onMount to avoid asking about window object on server side.
<script>
    import { onMount } from 'svelte';

    let snake = [{ x: 5, y: 5 }];
    let direction = { x: 1, y: 0 };

    const move = () => {
        snake = [{ x: snake[0].x + direction.x, y: snake[0].y + direction.y }, ...snake.slice(0, -1)];
    };

    setInterval(move, 200);

    let map = Array.from({ length: 20 }, () => Array.from({ length: 20 }, () => 0));

    onMount(() => {
        window.addEventListener('keydown', (event) => {
            if (event.key === 'ArrowUp') {
                direction = {x: 0, y: -1};
            } else if (event.key === 'ArrowDown') {
                direction = {x: 0, y: 1};
            } else if (event.key === 'ArrowLeft') {
                direction = {x: -1, y: 0};
            } else if (event.key === 'ArrowRight') {
                direction = {x: 1, y: 0};
            }
        });
    });
</script>

<div>
    {#each map as row, y}
        {#each row as cell, x}
            <div class="map-cell" style="top: {y * 20}px; left: {x * 20}px;"></div>
        {/each}
    {/each}

    {#each snake as segment}
        <div class="snake-segment" style="top: {segment.y * 20}px; left: {segment.x * 20}px;"></div>
    {/each}
</div>

<style>
    .snake-segment {
        position: absolute;
        width: 20px;
        height: 20px;
        background: green;
    }

    .map-cell {
        position: absolute;
        width: 20px;
        height: 20px;
        background: white;
        border: 1px solid black;
    }
</style>
Snake eating
Now we can make snake eat food. We will add food object and check if snake head is on food position.
Then we will generate new food position and add new segment to snake without removing last segment.
<script>
    import { onMount } from 'svelte';

    let snake = [{ x: 5, y: 5 }];
    let direction = { x: 1, y: 0 };
    let food = { x: 10, y: 10 };

    const move = () => {
        const head = { x: snake[0].x + direction.x, y: snake[0].y + direction.y };

        if (head.x === food.x && head.y === food.y) {
            food = { x: Math.floor(Math.random() * 20), y: Math.floor(Math.random() * 20) };
            snake = [head, ...snake];
        } else {
            snake = [head, ...snake.slice(0, -1)];
        }
    };

    setInterval(move, 200);

    let map = Array.from({ length: 20 }, () => Array.from({ length: 20 }, () => 0));

    onMount(() => {
        window.addEventListener('keydown', (event) => {
            if (event.key === 'ArrowUp') {
                direction = {x: 0, y: -1};
            } else if (event.key === 'ArrowDown') {
                direction = {x: 0, y: 1};
            } else if (event.key === 'ArrowLeft') {
                direction = {x: -1, y: 0};
            } else if (event.key === 'ArrowRight') {
                direction = {x: 1, y: 0};
            }
        });
    });
</script>

<div>
    {#each map as row, y}
        {#each row as cell, x}
            <div class="map-cell" style="top: {y * 20}px; left: {x * 20}px;"></div>
        {/each}
    {/each}

    {#each snake as segment}
        <div class="snake-segment" style="top: {segment.y * 20}px; left: {segment.x * 20}px;"></div>
    {/each}

    <div class="food" style="top: {food.y * 20}px; left: {food.x * 20}px;"></div>
</div>

<style>
    .snake-segment {
        position: absolute;
        width: 20px;
        height: 20px;
        background: green;
    }

    .map-cell {
        position: absolute;
        width: 20px;
        height: 20px;
        background: white;
        border: 1px solid black;
    }

    .food {
        position: absolute;
        width: 20px;
        height: 20px;
        background: red;
    }
</style>
Collision detection
To make game playable we need to add collision detection. We will check if snake head is on map border or on snake body.
<script lang="ts">
    import { onMount } from 'svelte';

    let snake = [{ x: 5, y: 5 }];
    let direction = { x: 1, y: 0 };
    let food = { x: 10, y: 10 };
    const gridSize = 20;
    let gameOver = false;

    const move = () => {
        if (gameOver) return;

        const head = { x: snake[0].x + direction.x, y: snake[0].y + direction.y };

        // Check for collisions with borders
        if (head.x < 0 || head.x >= gridSize || head.y < 0 || head.y >= gridSize) {
            endGame("You hit the border!");
            return;
        }

        // Check for collisions with the snake itself
        if (snake.some(segment => segment.x === head.x && segment.y === head.y)) {
            endGame("You collided with yourself!");
            return;
        }

        // Check if the snake eats the food
        if (head.x === food.x && head.y === food.y) {
            food = { x: Math.floor(Math.random() * gridSize), y: Math.floor(Math.random() * gridSize) };
            snake = [head, ...snake];
        } else {
            snake = [head, ...snake.slice(0, -1)];
        }
    };

    const endGame = (message: string) => {
        gameOver = true;
        console.log(message); // Optionally log the message for debugging
    };

    const resetGame = () => {
        gameOver = false;
        snake = [{ x: 5, y: 5 }];
        direction = { x: 1, y: 0 };
        food = { x: Math.floor(Math.random() * gridSize), y: Math.floor(Math.random() * gridSize) };
    };

    setInterval(move, 200);

    let map = Array.from({ length: gridSize }, () => Array.from({ length: gridSize }, () => 0));

    onMount(() => {
        window.addEventListener('keydown', (event) => {
            if (gameOver) return;
            if (event.key === 'ArrowUp' && direction.y === 0) {
                direction = { x: 0, y: -1 };
            } else if (event.key === 'ArrowDown' && direction.y === 0) {
                direction = { x: 0, y: 1 };
            } else if (event.key === 'ArrowLeft' && direction.x === 0) {
                direction = { x: -1, y: 0 };
            } else if (event.key === 'ArrowRight' && direction.x === 0) {
                direction = { x: 1, y: 0 };
            }
        });
    });
</script>

<div>
    {#if gameOver}
        <div class="overlay">
            <p>Game Over!</p>
            <button on:click={resetGame}>Restart</button>
        </div>
    {/if}

    {#each map as row, y}
        {#each row as cell, x}
            <div class="map-cell" style="top: {y * 20}px; left: {x * 20}px;"></div>
        {/each}
    {/each}

    {#each snake as segment}
        <div class="snake-segment" style="top: {segment.y * 20}px; left: {segment.x * 20}px;"></div>
    {/each}

    <div class="food" style="top: {food.y * 20}px; left: {food.x * 20}px;"></div>
</div>

<style>
    .snake-segment {
        position: absolute;
        width: 20px;
        height: 20px;
        background: green;
    }

    .map-cell {
        position: absolute;
        width: 20px;
        height: 20px;
        background: white;
        border: 1px solid black;
    }

    .food {
        position: absolute;
        width: 20px;
        height: 20px;
        background: red;
    }

    .overlay {
        position: absolute;
        top: 0;
        left: 0;
        width: 100%;
        height: 100%;
        background: rgba(0, 0, 0, 0.8);
        color: white;
        display: flex;
        flex-direction: column;
        justify-content: center;
        align-items: center;
        z-index: 10;
    }

    .overlay button {
        margin-top: 10px;
        padding: 10px 20px;
        background: white;
        color: black;
        border: none;
        cursor: pointer;
        font-size: 1rem;
    }
</style>
This is the end of classic snake game. We are going to add more features like score, speed increase, multiplayer, but first we will deploy this game on deno deploy.
Deploy on Deno
There is docs of svelte kit adapters and reddit discussion.
Both docs and discussion not present any working solution documented step by step.
There is deno dashboard https://dash.deno.com/projects where you can select svelte, but it not works by default.
First we need to replace @sveltejs/adapter-auto with @sveltejs/adapter-static in svelte.config.js.
pnpm remove @sveltejs/adapter-auto
pnpm add @sveltejs/adapter-static
in svelte.config.js change
import adapter from "@sveltejs/adapter-auto";
to
import adapter from "@sveltejs/adapter-static";
to make all routes be fully prerenderable, we add file src/routes/+layout.ts with content
export const prerender = true;
Now if we run pnpm build we will have build directory with static files.
To serve from this directory we need one more script - statoc/mod.ts in main directory
import { serve } from "https://deno.land/[email protected]/http/mod.ts";

serve((req) => {
    const url = new URL(req.url);
    const filePath = `${Deno.cwd()}${url.pathname}`;

    try {
        const file = Deno.readFileSync(filePath);
        const contentType = getContentType(url.pathname);
        return new Response(file, {
            headers: { "content-type": contentType || "application/octet-stream" },
        });
    } catch {
        const file = Deno.readFileSync(`${Deno.cwd()}/index.html`);
        return new Response(file, {headers: { "content-type": "text/html" } });
    }
});

function getContentType(pathname: string): string | undefined {
    const ext = pathname.split(".").pop();
    switch (ext) {
        case "html": return "text/html";
        case "js": return "application/javascript";
        case "css": return "text/css";
        case "png": return "image/png";
        case "jpg": return "image/jpeg";
        case "svg": return "image/svg+xml";
        case "json": return "application/json";
        default: return undefined;
    }
}
Configuring deno deploy manually there will be generated github actions workflow file .github/workflows/deploy.yml with content
name: Deploy
on:
  push:
    branches: main
  pull_request:
    branches: main

jobs:
  deploy:
    name: Deploy
    runs-on: ubuntu-latest

    permissions:
      id-token: write # Needed for auth with Deno Deploy
      contents: read # Needed to clone the repository

    steps:
      - name: Clone repository
        uses: actions/checkout@v4

      - name: Install Deno
        uses: denoland/setup-deno@v2
        with:
          deno-version: v2.x

      - name: Install Node.js
        uses: actions/setup-node@v4
        with:
          node-version: lts/*

      - name: Install step
        run: "deno install --allow-scripts"

      - name: Build step
        run: "npm run build"

      - name: Upload to Deno Deploy
        uses: denoland/deployctl@v1
        with:
          project: "snake-svelte"
          entrypoint: "mod.ts"
          root: "build"
so mod.ts in static will be place in the as build directory.
Now you cane deploy just sending code to github repository.
You can see result on
https://snake-svelte-ppwa4dcfqbyd.deno.dev/
Or for more advanced version, that will be described in next posts
https://snake-svelte.deno.dev/
Repository with project
https://github.com/gustawdaniel/snake_js
I added few changes in css to make game more playable, that are not enough interesting to attach them here but you can check them in commit
Other articles
You can find interesting also.

Fastify Prisma REST backend
Typescript template for Fastify REST API with Prisma and JWT authentication.

Daniel Gustaw
• 7 min read

New Google Identity in Nuxt 3
New Google Identity installation for Nuxt 3 with credentials verification in fastify.

Daniel Gustaw
• 6 min read

Visualization of a dynamic correlation network.
Python script for visualizing the dynamics of the relationship between financial instruments measured by correlation.

Daniel Gustaw
• 16 min read